



How to Move Files from an Old OneDrive Account to a New One
- Last Updated on 27 July 2026
- 17 Min Read
- Posted on May 28, 2026
Moving files from one OneDrive account to another is not as straightforward as it sounds. Microsoft does not offer a built-in “transfer” button, so the right approach depends on your account type, file size, and whether you are on a personal or work/school setup. This guide walks you through every available method to transfer OneDrive files to another account safely, covers the hidden pitfalls most guides skip over (like metadata loss and sync freezes), and helps you pick the path that fits your situation.
Switching OneDrive accounts is something many people run into at some point. Maybe you graduated and lost access to your school account. Maybe you started a new job, changed your personal email, or simply want to consolidate your files under one profile.
Whatever the reason, the process requires a few careful steps to make sure nothing gets lost or corrupted along the way.
The challenge is that OneDrive was not built to merge or move data between accounts automatically. There is no single “Transfer All” button. Instead, the method that works best for you depends on what type of accounts are involved, how much data you are moving, and what restrictions might be in place.
This guide covers all of that in plain language, so you can transfer OneDrive files to another account without running into surprises.
First, Know Which Scenario Applies to You
Before doing anything else, match your situation to the right method. Using the wrong approach can cause data loss, corrupt files, or waste hours of time.
| Your Situation | Best Method |
|---|---|
| Personal account to personal account | OneDrive Desktop App (local copy) |
| School or work account to personal account | Microsoft Mover Wizard (browser-based) |
| Restricted corporate account with blocked external sharing | Local Staging Folder method |
| Large volumes of data (50GB or more) | Desktop App with Robocopy for timestamp preservation |
Once you know which row matches your situation, jump to the corresponding section below.
Method 1: Personal to Personal Account Transfer (Using the Desktop App)
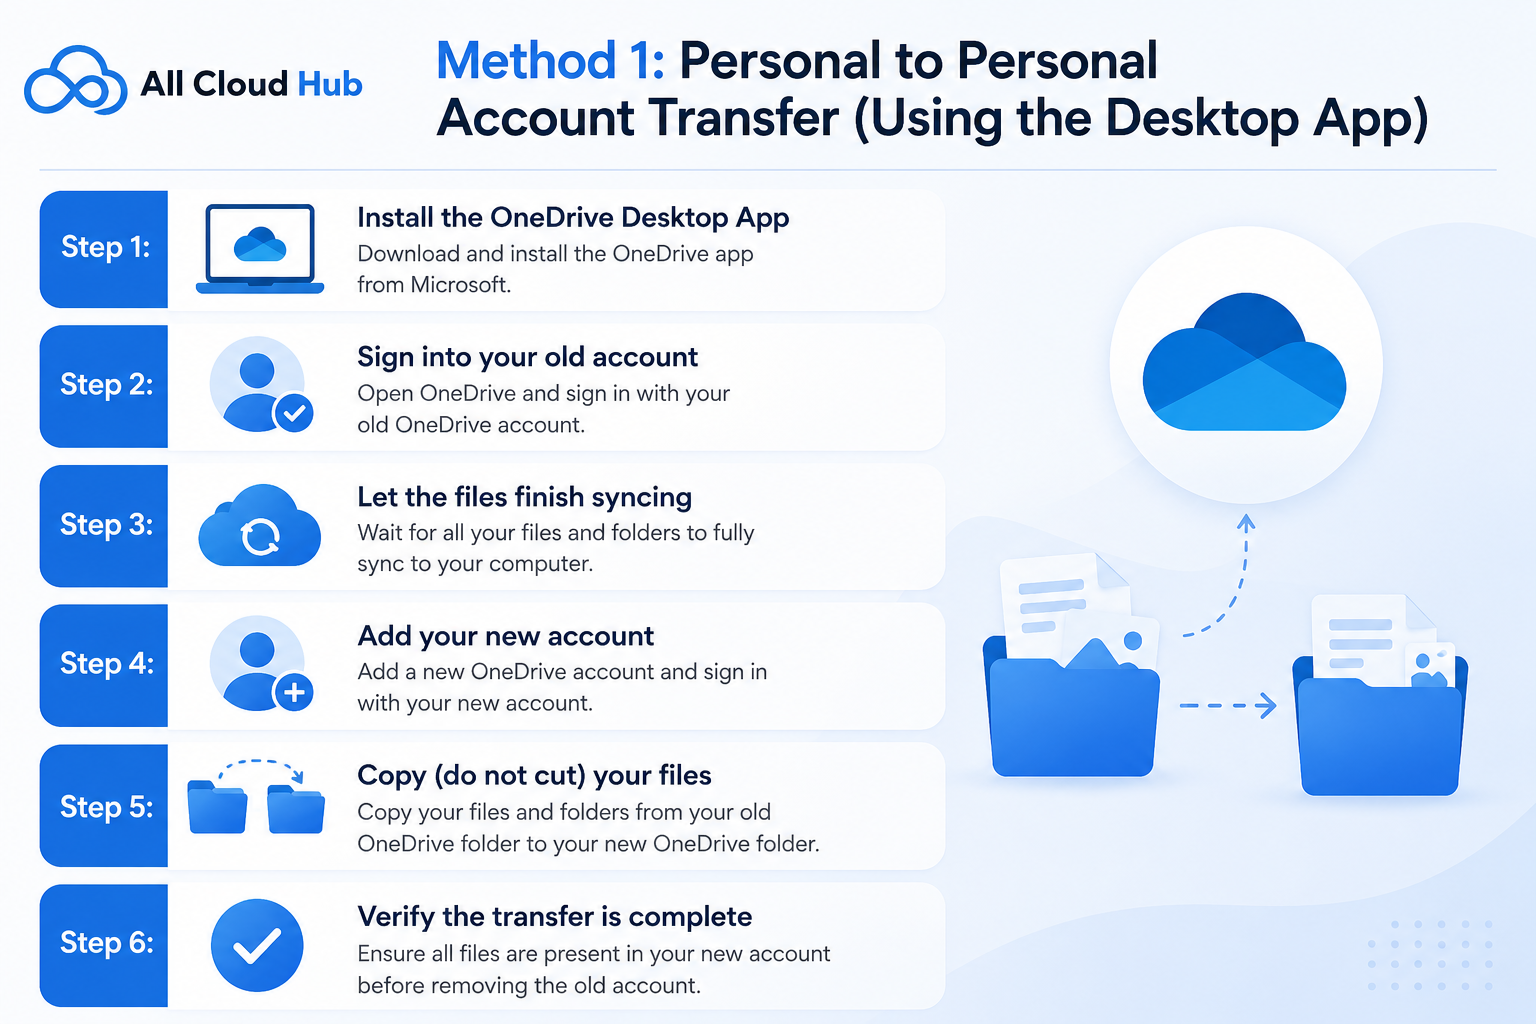
This is the most common situation. Someone has two personal Microsoft accounts and wants to move files from the old one to the new one.
- Step 1: Install the OneDrive Desktop App
Download and install the OneDrive desktop app if you do not already have it. It is available on both Windows and Mac.
- Step 2: Sign into your old account
Open OneDrive and sign in with the credentials for the account that currently holds your files.
- Step 3: Let the files finish syncing
Wait until all files show a solid green checkmark icon in File Explorer or Mac Finder. This confirms the files are fully downloaded to your computer and ready to move. Do not skip this step. Moving files that are still in “Online Only” mode can trigger a sync loop that freezes your system.
- Step 4: Add your new account
Click the OneDrive icon in your taskbar, go to Settings, select the Account tab, and click “Add an account.” Sign in with your new Microsoft account credentials. Both accounts will now appear as separate folders in File Explorer.
- Step 5: Copy (do not cut) your files
Select the folders you want to move from the old account’s folder and copy them into the new account’s folder. Always copy first rather than cut. If the upload fails midway, your original files will still be safe on the old account.
- Step 6: Verify the transfer is complete
Once all files show a green checkmark on the new account side, confirm that everything looks correct before deleting anything from the old account.
Important: If your laptop has less than 20GB of free local storage, avoid syncing both accounts at the same time. The system will try to download from one account and upload to the other simultaneously, which can overwhelm lower-spec machines and cause crashes.
Method 2: School or Work Account to Personal Account (Using Microsoft Mover)
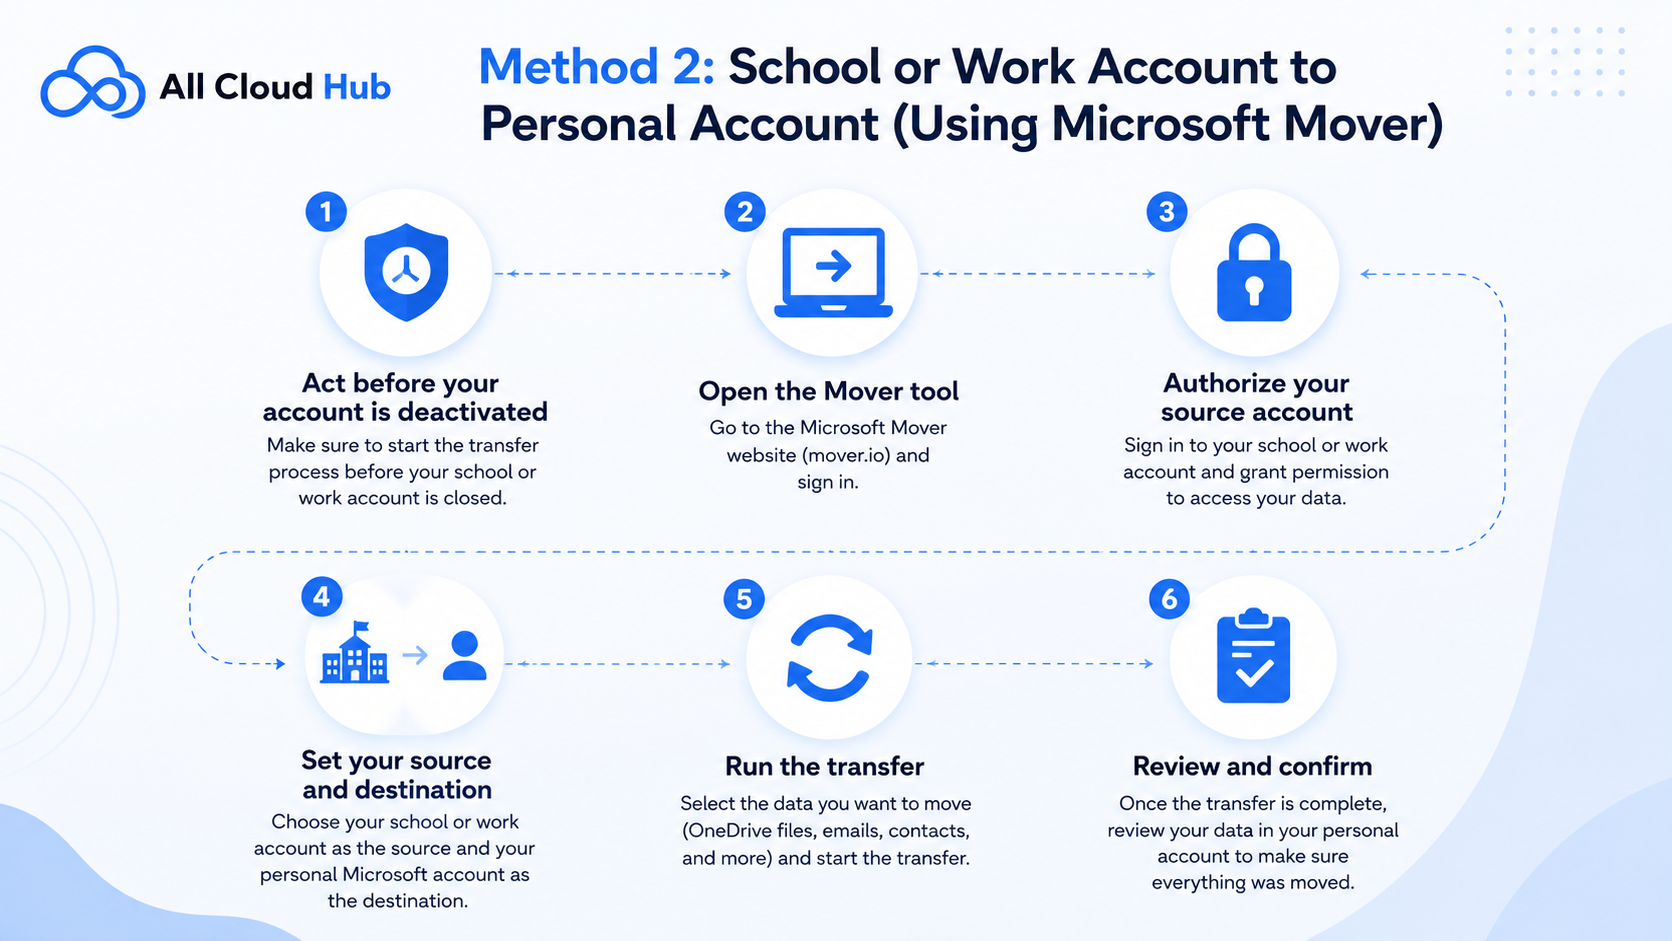
If you are trying to transfer OneDrive files to another account and your source account is a school or workplace account, the desktop drag-and-drop approach often will not work. Corporate and academic accounts frequently restrict external sharing and app access. Microsoft’s official tool for this situation is the Mover Transfer Wizard.
- Step 1: Act before your account is deactivated
School and work accounts are often shut down shortly after graduation or resignation. Start this process as soon as you know you need to move your files.
- Step 2: Open the Mover tool
Go to mover.io in your web browser and sign in with your personal Microsoft account (the one you want to receive the files).
- Step 3: Authorize your source account
Follow the on-screen prompts to authorize access to your old school or work OneDrive. This uses a secure OAuth connection and does not require you to share your password.
- Step 4: Set your source and destination
Select your old account as the source and your personal OneDrive as the destination.
- Step 5: Run the transfer
Click “Start Transfer.” The tool runs the migration in the cloud, meaning your computer does not need to stay on for the entire process.
- Step 6: Review and confirm
Once complete, check your personal OneDrive to confirm all folders and files arrived correctly.
Note for restricted accounts: If your institute or company IT department has blocked external API access, the Mover tool may not be able to connect to your old account at all. In that case, contact your IT administrator and ask them to grant temporary permission for an authorized transfer, or use the Local Staging Folder method described below.
Method 3: Local Staging Folder Method (For Restricted or Blocked Accounts)
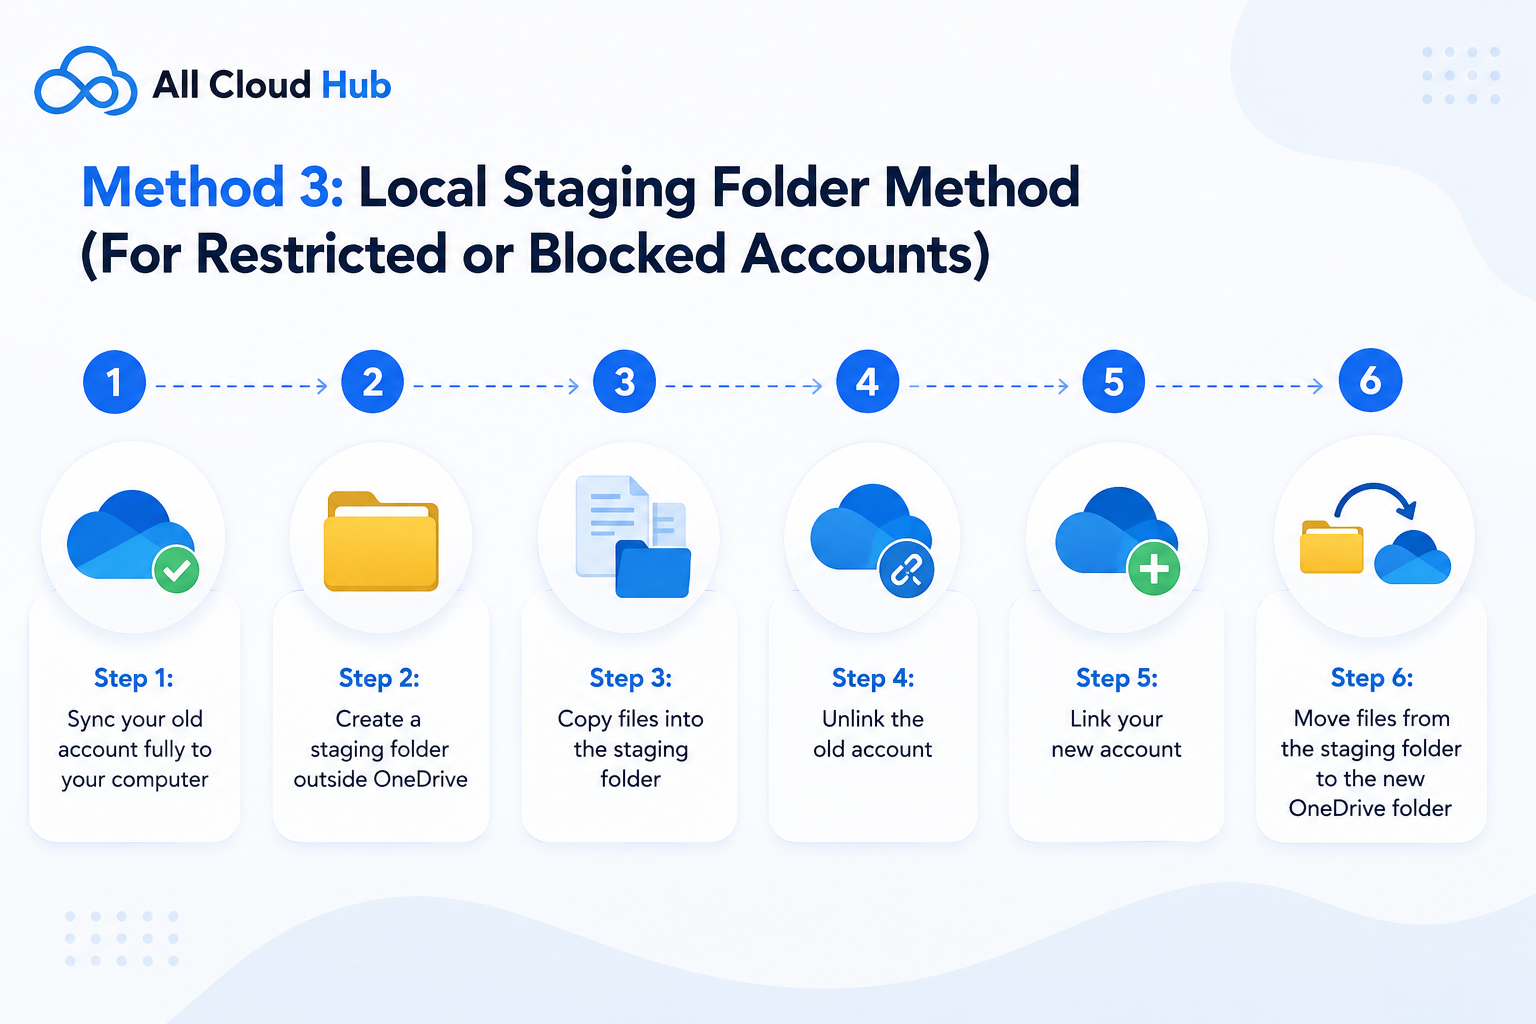
When external sharing is blocked and third-party tools cannot connect, a local staging folder gives you a reliable workaround to transfer OneDrive files to another account without triggering security alerts.
- Step 1: Sync your old account fully to your computer
Make sure all files from your old OneDrive are downloaded locally. Check for the green checkmark on each file or folder.
- Step 2: Create a staging folder outside OneDrive
On your computer, create a new folder in a location that is not inside any OneDrive sync folder. For example, create a folder on your Desktop or in your Documents library and name it something like “Transfer Files.”
- Step 3: Copy files into the staging folder
Copy all the files and folders you want to keep from the old OneDrive sync folder into this staging folder.
- Step 4: Unlink the old account
Go to OneDrive settings, click the Account tab, and select “Unlink this PC” for the old account.
- Step 5: Link your new account
Sign in to OneDrive with your new account credentials.
- Step 6: Move files from the staging folder to the new OneDrive folder
Drag the contents of your staging folder into the new OneDrive sync folder. The new account will begin uploading the files automatically.
This method keeps everything fully under your control and avoids browser-based upload failures or ZIP corruption errors.
How to Transfer OneDrive Files Without Changing Creation Dates
This is one of the most overlooked problems in any OneDrive migration. When you download files through the browser and re-upload them, or when you move them using basic copy-paste through certain tools, the “Date Created” and “Modified By” timestamps get reset to the current day.
If you rely on file dates to stay organized, particularly for photos, contracts, or project files, this can quietly ruin your entire filing system.
The good news is that there is a free, built-in solution for Windows users.
Using Windows Robocopy to Preserve Timestamps
Robocopy is a command-line tool built into Windows that copies files while keeping all original metadata intact, including creation dates and modification timestamps.
Open the Command Prompt as an administrator and run the following command:
robocopy "C:\\Users\\YourName\\OneDrive - OldAccount" "C:\\Users\\YourName\\OneDrive - NewAccount" /E /COPY:DAT /MT:16
Here is what each part of this command does:
- “Source path” points to your old OneDrive folder on your local drive
- “Destination path” points to your new OneDrive folder
- /E copies all subdirectories, including empty ones
- /COPY:DAT preserves data, attributes, and timestamps
- /MT:16 runs 16 threads at once to speed up the process
Let the command finish completely before closing the window. Once done, open your new OneDrive folder and verify that the dates on your files match the originals.
Mac users: Mac doesn’t have Robocopy built in. Use the Terminal app with the
rsync -acommand, which preserves timestamps in a similar way. The command format is:rsync -a /Source/OneDrive/ /Destination/OneDrive/
A Special Note on OneNote Notebooks
OneNote files do not behave like regular documents. Simply downloading a .one notebook file and uploading it to a new account breaks the internal sync pathways that OneDrive uses to keep it updated.
The result is that the notebook may appear in the new account but show as unreadable or fail to sync correctly.
To move a OneNote notebook safely, follow these steps:
- Open the OneNote desktop application (not the web version) while signed into your old account.
- Go to File, then select Export.
- Choose the notebook you want to move and export it as a
.onepkgfile, which is the OneNote Package format. - Sign into the OneNote desktop app with your new account.
- Go to File and select Open, then choose to import the
.onepkgfile. - Once the notebook opens correctly, allow it to sync to your new OneDrive account.
This process keeps the notebook structure and all its pages fully intact.
Why You Should Avoid Browser ZIP Downloads for Large Files
Many guides suggest downloading your entire OneDrive as a ZIP file from the browser and then re-uploading it to the new account. This approach seems simple, but it creates serious problems with larger file sets.
When you download multiple files or folders through the OneDrive web interface, Microsoft automatically compresses them into a single ZIP archive. If the total size is above 20GB, the browser frequently times out before the download finishes. The result is either a corrupted ZIP file or one that is missing files entirely, with no warning that anything went wrong.
If you need to store large files or move them between accounts, always use the desktop app sync method or the Robocopy command instead of relying on browser-based ZIP downloads. This keeps your data safe regardless of file size.
Similarly, if you ever need to share large files after completing your migration, using the OneDrive desktop app or a dedicated cloud tool will give you much more reliable results than working entirely through the browser.
What Happens to Shared Folder Permissions After a Migration?
This is a common question that most guides do not address clearly. When you move files to a new OneDrive account, any shared folder links connected to the old account become inactive. People who had access to your old shared folders will lose that access once the files move.
To handle this correctly:
- Before migrating, make a list of all folders you have shared with others.
- After the migration is complete and your files are confirmed in the new account, recreate the sharing links from the new account.
- Send the updated links to anyone who needs access.
If you regularly share files with a team or collaborators, it is worth reading up on how to manage multiple cloud storage accounts to keep things organized during and after the transition.
What to Do If Your Files Go Missing After the Transfer
If you complete a migration and notice some files or folders did not show up in the new account, do not panic and do not delete anything from the old account yet.
Start by checking the Recycle Bin on both accounts. OneDrive keeps deleted files for up to 93 days, so you can usually recover deleted files if something was accidentally removed during the process.
If the files are not in the Recycle Bin, check the following:
- Make sure the sync on the new account has fully completed. Large transfers can take several hours to finish syncing.
- Look for files that may have been skipped due to unsupported characters in the file name. OneDrive does not support certain special characters. Rename those files on the old account and try again.
- Check if the missing files were “Online Only” on the old account. If they were not fully downloaded before you unlinked the old account, they may not have been copied.
A Smarter Way to Handle This: All Cloud Hub
If you are managing more than one cloud account or regularly moving files between services, doing everything manually each time adds up quickly. All Cloud Hub is built to handle exactly these kinds of cross-account and cross-platform file management tasks from a single dashboard.
Rather than logging in and out of multiple Microsoft accounts or setting up separate desktop sync folders, All Cloud Hub lets you connect your accounts in one place and manage file transfers more efficiently. It is especially useful if you are working across different cloud services alongside OneDrive, since keeping everything in sync across platforms becomes much harder when you are switching between accounts manually.
For anyone who regularly moves between personal and professional cloud environments, having a centralized management layer saves a significant amount of time.
Choosing the Right Cloud Storage After Your Migration
Once your migration is complete, it is a good moment to think about how you are organizing your cloud storage going forward. Many people end up with files scattered across multiple accounts and platforms because they set things up reactively rather than intentionally.
If you are using OneDrive primarily for personal storage, it is worth reviewing what cloud storage options work best for personal use and whether your current plan gives you enough space and flexibility. Having a clear setup from the start makes future migrations far less stressful.
Final Thoughts
The process to transfer OneDrive files to another account does not have to be complicated, but it does require choosing the right method for your situation. Personal-to-personal transfers work best through the desktop app. School or work accounts are better handled through the Mover Wizard. Restricted accounts need the local staging folder approach.
Beyond just getting files from A to B, protecting your timestamps with Robocopy, handling OneNote notebooks separately, and being careful about large ZIP downloads will save you from the most common mistakes that other guides leave out.
That said, even with the right method in hand, the manual process of logging into multiple accounts, syncing folders, watching for errors, and then verifying everything arrived correctly takes real time and attention. If you are someone who deals with this kind of cross-account file management more than once, doing it entirely by hand each time is not a sustainable approach.
This is the gap that All Cloud Hub is designed to fill. Instead of juggling separate OneDrive accounts across different browser tabs and desktop sync folders, All Cloud Hub gives you a single place to connect and manage multiple supported cloud accounts together.
Whether you are moving files between two personal OneDrive profiles, shifting data from a work account to a personal one, or keeping files organized across different cloud platforms altogether, having everything visible and manageable from one dashboard removes a significant amount of the friction involved.
Take it step by step, always copy before you delete, and verify everything before you close the old account permanently. And if the process feels like more work than it should be, that is a good sign that a more centralized approach to managing your cloud storage would save you time going forward.
Frequently Asked Questions
- Can I transfer OneDrive files to another account without downloading anything to my computer?
Yes, but only in specific situations. If you are moving from a school or work account to a personal one, the Microsoft Mover Wizard runs the transfer entirely in the cloud, so nothing needs to touch your local drive. For personal-to-personal transfers, the desktop app method does require local syncing. If you want to avoid using your computer’s storage entirely for cross-account or cross-platform moves, All Cloud Hub lets you manage and transfer files between connected cloud accounts from a centralized dashboard without relying on your local hard drive as a middleman.
2. Why did my file creation dates change after I moved them to the new OneDrive account?
This happens when files are downloaded through the browser and re-uploaded, or when certain automated tools treat the copied files as brand new uploads. OneDrive records the upload date as the new creation date in these cases. To prevent this, use the Windows Robocopy command with the /COPY:DAT flag during a local desktop transfer. This tells the system to carry the original timestamps over instead of resetting them. Avoiding browser-based ZIP downloads is the most important step since that method is the most common cause of timestamp overwrites.
3. Can I transfer OneDrive files to another account and also move them to a completely different cloud service at the same time?
Not natively within OneDrive itself. OneDrive is designed to work within Microsoft’s own ecosystem, so moving files to a service like Dropbox or Google Drive at the same time as switching accounts requires separate steps. This is where a tool like All Cloud Hub becomes genuinely useful. It allows you to connect multiple cloud platforms in one place, so you can transfer files between OneDrive accounts and also migrate content to other cloud services as part of the same workflow, rather than handling each move separately.
4. What happens if my internet connection drops in the middle of a transfer?
The outcome depends on which method you are using. If you are using the OneDrive desktop app, the sync will pause and resume automatically once the connection is restored, and no data will be lost. If you are downloading files through the browser as a ZIP archive, a dropped connection usually corrupts or aborts the download entirely and you will need to start over. The Mover Wizard is also fairly resilient since it runs server-side, but a very long interruption can cause it to time out. For large transfers, the desktop app or Robocopy method is the most reliable option because both can resume from where they left off.
5. Why does my OneDrive desktop app freeze when I try to sync both accounts at the same time?
This usually happens when one or both accounts contain files that are set to “Online Only” mode. When you try to move these files, OneDrive attempts to download them from the cloud and re-upload them to the new account simultaneously. On computers with less than 20GB of free local storage or a slower internet connection, this creates a sync loop that can freeze or crash the app. The fix is to right-click the files or folders you want to move, select “Always keep on this device,” and wait for them to fully download before starting the transfer.
6. I moved my files to the new account but some folders are missing. Where did they go?
The first place to check is the Recycle Bin on both accounts. OneDrive keeps deleted files for up to 93 days, so recovery is usually possible. Beyond that, check whether the missing files had unsupported characters in their names, such as asterisks, quotation marks, or pipe symbols, since OneDrive automatically skips files with those characters during a transfer. Also confirm that the files were not still in “Online Only” mode on the old account when you unlinked it, because files in that state may not have been copied over to your local drive before the sync disconnected.