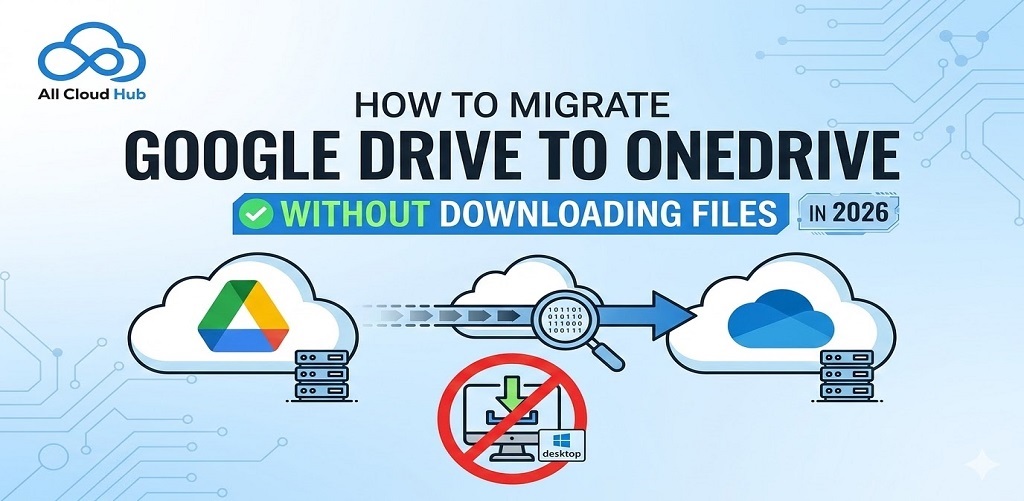
How to Migrate Google Drive to OneDrive in 2026 Without Downloading Files
- Posted on April 16, 2026
- 20 Min Read
- Last Updated on 24 July 2026
Moving files from Google Drive to Microsoft OneDrive has become a much more common task than most people expect. Cloud storage is no longer just a backup tool. It sits at the center of how people work, collaborate, and store important data. With over 1 billion Google Drive users and 400+ million OneDrive users globally, these two platforms dominate how teams and individuals manage files today.
That scale is exactly why migration between them is so common. People switch ecosystems when they move to Microsoft 365, when storage limits become restrictive, or when collaboration needs change. But despite how frequent this shift is, the actual migration process is often misunderstood. Many assume it requires downloading everything locally and re-uploading it, which is actually a slow transfer process, error-prone, and unnecessary in 2026.
This guide focuses on the fastest and most practical way to migrate your data without downloading anything to your computer. It walks you through cloud-to-cloud transfer methods that move files directly between platforms, explains how Google-native files are converted during the process, and highlights the limitations that every method shares. You will also see where things typically break, why certain files do not transfer, and how to handle edge cases like shared content.
By the end, you will not just know how to move your files from Google Drive to OneDrive, but how to do it in a way that avoids common data loss issues, preserves structure as much as possible, and fits the way you actually use cloud storage today.
What You Need to Know About This Migration
Most migration guides skip this part entirely. They dive straight into steps and leave you discovering and halfway through that your Google Docs turned into Word files, your shared folders didn’t move, and your carefully arranged folder structure needs fixing.
This section is short, but it will save you a significant amount of frustration.
Also Read – How to Connect Google Drive
How your Google files get converted
Google’s native file formats don’t exist in Microsoft’s ecosystem. When any migration method moves them to OneDrive, they are automatically converted. Here’s exactly what becomes what:
| Google Format | Result in OneDrive | Notes |
|---|---|---|
| Google Docs (.gdoc) | Microsoft Word (.docx) | Complex formatting may need review |
| Google Sheets (.gsheet) | Microsoft Excel (.xlsx) | Complex formulas may render differently |
| Google Slides (.gslides) | Microsoft PowerPoint (.pptx) | Custom fonts and animations may differ |
| PDF, images, videos, ZIP | Unchanged | All standard file types transfer as-is |
| Google Drawings | Not imported (native tool) | Must be exported manually or handled by third-party tool |
| Google Forms, Sites, Maps | Not imported by any method | These are web apps, not files — they must be recreated or handled separately |
Three things no migration method will do automatically
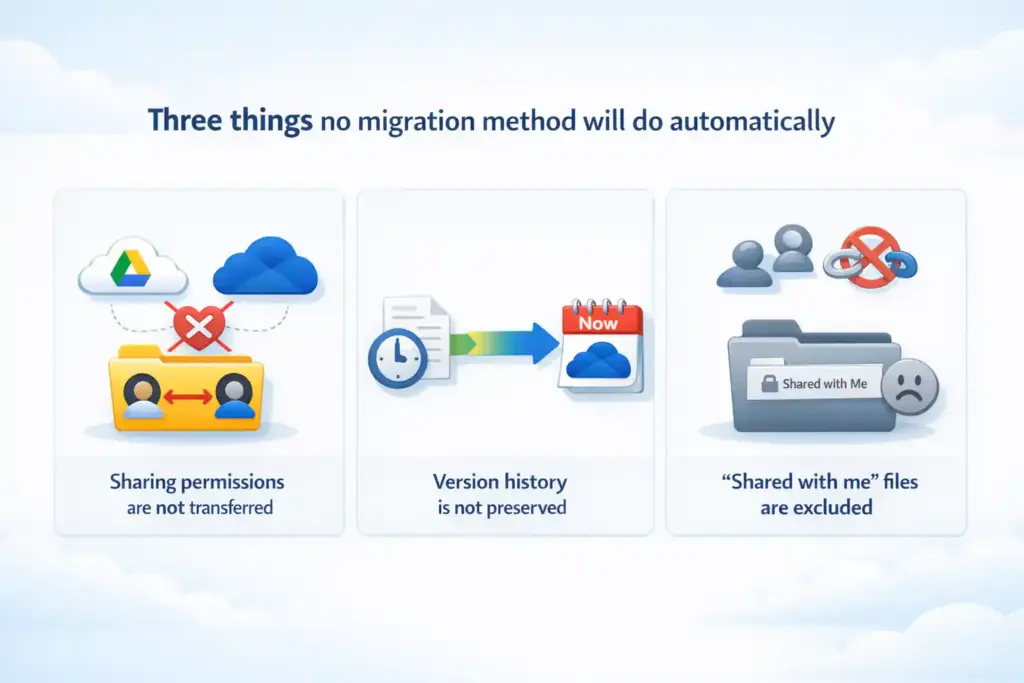
Limitations are applied to every method in this guide
- Sharing permissions are not transferred. Any file you shared with colleagues, or that was shared with you, will need to be re-shared manually inside OneDrive after migration. No fully automated method (paid or free) recreates sharing settings. This is a structural limitation of both platforms, not a product gap.
- Version history is not preserved by most methods. The converted file in OneDrive starts a new version history from the date of migration. If you need historical versions, export them from Google Drive before migrating.
- Files in “Shared with me” are excluded. You don’t own those files they live in someone else’s Drive. Neither Microsoft’s native import tool nor Google Takeout will automatically move them. See the dedicated section below for your options.
Check your OneDrive storage before you start
Open OneDrive on the web, click your profile icon, and check how much storage is available. If your Google Drive holds 12GB and OneDrive only has 3GB free, the import will fail partway through sometimes silently. Add storage if necessary and wait at least 24 hours before starting, as changes may take time to propagate.
Also Read – How to Connect OneDrive
The Fastest Method: Migrate Without Downloading Using Microsoft’s Built-In Import Tool
This is the method to use for most people. It’s free, requires no software installation, and the entire transfer happens in the cloud your computer doesn’t need to stay on and your internet connection doesn’t need to sustain a large upload. A 10GB Google Drive typically completes in under 30 minutes using this method, though timing varies with server load.
Who this works for:
Anyone with a personal OneDrive account or Microsoft 365 Personal/Family subscription migrating their own Google Drive files. Files are copied, not moved and hence, your Google Drive remains intact until you choose to delete it.
Step-by-step instructions
- Go to One Drive and sign in Open your browser and navigate to One Drive Sign in with your Microsoft account (personal, or Microsoft 365 Personal/Family).
- Open Settings → “Import Cloud Photos and Files”Click the gear icon (Settings) in the top-right corner of the OneDrive interface. Look for the option labelled “Import Cloud Photos and Files” or equivalent. The exact path may vary if you don’t see it in Settings, check your profile menu.
- Select Google Drive as the source and sign in Choose Google Drive from the list of cloud providers. Sign in to your Google account when prompted and grant the necessary permissions. OneDrive connects to Google Drive directly nothing is stored locally.
- Choose which folders to import You can import everything or select specific folders. If you only need to move certain projects, select them now. Selective import keeps your OneDrive organised and avoids pulling in old files you no longer need.
- Start the import and then close your browser if you like Click the import button. The transfer runs entirely on Microsoft’s servers in the cloud. You don’t need to keep the tab open, and your computer doesn’t need to stay awake. You’ll receive an email notification when the import is complete.
- Check the TXT report in your OneDrive Imports folder When the import finishes, OneDrive creates a TXT report in a folder called Imports. Open it. It will list how many files and folders were imported, and flag any items that couldn’t be imported and this is where you’ll see Google Drawings or other unsupported formats.
- Verify file count and spot-check converted documents Compare the number of files in your new OneDrive Imports folder against your original Google Drive. Open 5–10 converted documents like a Google Doc that became a .docx and scroll through them. Check that tables, headers, and any complex formatting transferred cleanly.
What this method does NOT include
- Google Drawings, Forms, Sites, and Maps as these are excluded by Microsoft’s native import tool
- Files in “Shared with me” which basically you don’t own them, so they are not imported
- Sharing permissions should be all permissions must be reconfigured in OneDrive manually
↳ Conditional Path
If you have files in “Shared with me” that you need: The built-in import tool will not move them. Jump to the Shared Files section below before starting your migration.
Alternative No-Download Method: Google Takeout → Direct to OneDrive
Google Takeout is Google’s official data export tool. Most people think of it as a way to download their data but it has a lesser-known option that delivers your export directly to OneDrive, no local download required. It’s useful when you want Google itself to handle the export, or when you specifically need to preserve your folder structure.
One important distinction from the Microsoft built-in import: this is not true cloud-to-cloud streaming. Google packages your Drive into a ZIP archive and then delivers that ZIP to your OneDrive. The result is the same, but the process takes longer and for large accounts, more cleanup may be needed afterward.
Step-by-step instructions
- Go to takeout and sign in Open takeout in your browser and sign in to your Google account.
- Deselect all, then select only DriveClick “Deselect all” at the top of the product list. Then scroll down and check the box next to Drive only. This prevents Takeout from bundling in Gmail, Photos, and other services you don’t need.
- Scroll down and click “Next step”At the bottom of the product selection page, click “Next step” to move to the export settings.
- Choose “Add to OneDrive” as the delivery methodIn the Destination dropdown, select “Add to OneDrive”. Set Frequency to “Export once”. For File type, leave it as .zip. Set the File size to the maximum option (typically 50GB) — if your Drive exceeds 50GB, multiple ZIP files will be created.
- Click “Link accounts and create export”Click the button. You’ll be asked to sign in to your Microsoft account and grant Google permission to deliver files to your OneDrive. Follow the prompts.
- Wait for the email notificationGoogle will send you an email when the export is complete and delivered. For a 10–20GB Drive, expect anywhere from a few hours to 24 hours. Larger Drives (50GB+) can take 1–3 days.
- Find your files in OneDrive: Apps > Google Download Your DataOnce delivered, your exported files appear in Apps > Google Download Your Data inside your OneDrive. Your original folder structure from Google Drive is generally preserved within the ZIP.
Honest limitations of Google Takeout delivery
- Files in “Shared with me” are not exported, only files you own are expoerted
- Sharing permissions are not transferred
- Accounts over 50GB are split into multiple ZIPs some manual reorganization may be needed
- This is not real-time streaming but it’s an asynchronous export and delivery process that takes hours to days
↳ Conditional Path
If your Google Drive is over 50GB: The ZIP-splitting and reorganization work may outweigh the benefits of this method. Consider a third-party cloud-to-cloud tool (MultCloud or CBackup offer free tiers) that streams files directly between platforms without creating ZIP archives.
How to Handle “Shared with Me” Files – The Step Most Guides Miss
Here’s why files in “Shared with me” don’t move automatically: you don’t own them. Those files physically live in someone else’s Google Drive. When you migrate, you’re only moving your Drive not theirs. Neither Microsoft’s import tool nor Google Takeout can reach into another person’s storage.
This is a structural limitation of both platforms. It’s not a bug, and no tool (free or paid) can fully automate this without the cooperation of the original file owners. Understanding this upfront prevents a lot of confusion after migration.
Your three options
- Option A – Ask owners to reshare in OneDrive (recommended for ongoing access).
After your migration is complete, contact the people who shared files with you in Google Drive and ask them to share the same content from OneDrive (if they’ve also migrated) or send you a fresh copy. This is the cleanest long-term solution, but it requires coordination.
- Option B – Manually download and upload before you migrate.
In Google Drive, open the “Shared with me” section. Select the files you need. Right-click and choose Download. This saves them to your computer as actual files (not shortcuts). Then upload those files to your OneDrive manually. Note that sharing permissions still cannot be recreated this wayyou’ll have the files, but the original sharing structure won’t be preserved.
- Option C – Use a third-party tool that explicitly supports “Shared with me” migration.
Some cloud-to-cloud migration tools can be configured to include files from “Shared with me.” If this content is critical to your workflow, verify with the specific tool you choose that it explicitly supports this before starting.
Realistic expectation:
Regardless of which option you choose, sharing permissions in OneDrive will need to be set up from scratch. There is no automated path that recreates “this file is shared with these specific people” in OneDrive. Budget time for this in your migration plan.
Also Read – Syncing OneDrive and Dropbox in 2026: How to Manage Both From One Place
Which Method Is Right for Your Situation?
Most guides list every available method without telling you which one to actually use. Here’s a direct decision framework based on your specific situation. Pick the row that matches you.
| Your Situation | Recommended Method | Why |
|---|---|---|
| Personal account, under 15GB, no shared files | Microsoft built-in import | Free, fastest, runs in the cloud, no cleanup needed |
| Personal account, folder structure is important | Google Takeout → Add to OneDrive | Preserves folder hierarchy; Google handles the export |
| Large account (50GB+) or many shared files | Third-party cloud-to-cloud tool (e.g. MultCloud, CBackup) | Avoids ZIP splitting; some tools support “Shared with me” — verify before use |
| IT admin migrating multiple users | Microsoft SharePoint Migration Manager or Google Workspace admin console | Built for bulk, multi-user migrations; requires admin credentials |
| Tried desktop drag-and-drop and it failed | See “Mistakes to Avoid” below | Desktop drag-and-drop doesn’t work for Google-native files — explanation below |
One note on paid tools: if the Microsoft built-in import or Google Takeout method covers your situation, use those first. There’s no reason to pay for a migration tool that a free native option handles adequately.
All Cloud Hub moves your files server-to-server. 2TB transfers without touching your local drive. Keep folder structures intact.
Migrate Drive to OneDrive in 3 Clicks – No Downloading.
Mistakes to Avoid When Moving Google Drive to OneDrive
These aren’t theoretical edge cases these are the specific failure modes that send people back to search engines looking for answers. Both platforms have structural reasons for these behaviours, so this isn’t a criticism of Google or Microsoft. It’s just what happens when two different ecosystems meet.
- Dragging files using the desktop app (doesn’t work for Google-native files)
If you install both the Google Drive desktop app and the OneDrive desktop app, you might try dragging files from the Google Drive folder in File Explorer into the OneDrive folder.
For PDFs, images, and standard Office files already in your Drive, this works fine. But Google Docs, Sheets, and Slides appear in File Explorer as tiny .gdoc, .gsheet, and .gslides shortcut files not actual documents. Dragging them to OneDrive creates broken links, not working files.
If you’ve done this and found empty or inaccessible files in OneDrive, this is why. Use the web-based methods described above instead.
2. Not checking OneDrive storage before you start
If your OneDrive is full or nearly full, the import will fail partway through and the notification is easy to miss. Before starting, verify you have enough free space to accommodate everything you’re moving. If you need more storage, purchase the additional plan and wait at least 24 hours before starting the migration.
3. Assuming sharing permissions transfer automatically
They don’t, in fact, under any method. If you shared a folder with five colleagues in Google Drive, those sharing relationships do not carry over to OneDrive. Plan time after migration to manually re-share the files and folders that need it. The earlier you communicate this to your team, the smoother the cutover.
4. Migrating without a verification checklist
A migration that “completes successfully” doesn’t mean every file transferred correctly. Format conversions can break complex documents. Some file types are silently excluded. Without a post-migration check, you may not discover missing files until you need them. The next section provides a specific checklist to run through.
After the Migration: How to Verify Everything Transferred Correctly
This section is missing from every competitor guide in this space which is exactly why people discover problems weeks later. Run through this checklist before you do anything else with your new OneDrive storage.
- Compare file counts.
Open Google Drive and check your total file count (Settings → Storage in Google Drive, or simply note the count in My Drive). Then compare to the number of files in your OneDrive Imports folder. A significant discrepancy means files were excluded or failed consult the TXT report.
- Spot-check 5–10 converted documents.
Open a .docx that was a Google Doc. A .xlsx that was a Google Sheet. A .pptx that was a Slides presentation. Scroll through them. Check that headers, tables, charts, and formatting look correct. Documents with complex formatting or embedded images are most likely to have minor conversion artifacts.
- Review the TXT report in your Imports folder.
This file (generated automatically by the native import tool) lists every file imported and every file that couldn’t be imported. If you don’t see it, check the OneDrive Imports folder or Apps > Google Download Your Data (Takeout). Read through the “not imported” list carefully.
- Verify folder structure matches your original Google Drive.
Navigate through your top-level folders in OneDrive and confirm the hierarchy looks right. Flat exports or missing subfolders indicate a structural issue that needs manual correction.
- Test access to files previously shared with you.
Open a few documents from the “Shared with me” section in Google Drive and check whether equivalents exist in OneDrive. If you didn’t handle these before migrating, now is the time to contact the original owners for resharing.
- Consider a centralized dashboard for the transition period.
If you need to keep both Google Drive and OneDrive active while your team completes the switch accessing files from both platforms simultaneously like a centralized cloud storage dashboard like All Cloud Hub can let you manage files across cloud space in one place without switching between tabs. Verify that All Cloud Hub supports simultaneous Google Drive and OneDrive access before relying on this for your workflow.
When you’re confident everything transferred:
Only then should you consider deleting files from Google Drive. Keep your Google Drive intact for at least 30 days after migration, long enough to discover any gaps before they become urgent.
The Right Prep Makes Your Migration Effortless
Migrating from Google Drive to OneDrive is genuinely straightforward in 2026, provided you go in with a clear picture of what moves automatically, what gets converted, and what you’ll need to handle yourself. The tools to do it without touching your local storage exist, they’re free, and for most people they work well.
The core decision is simpler than it looks. If you have a personal account under 15GB with no complex sharing needs, Microsoft’s built-in import tool handles the entire migration in under an hour with no software installed. If folder structure matters more to you, Google Takeout delivers directly to OneDrive and preserves your hierarchy.
If you’re managing a larger account or coordinating a team migration, a third-party cloud-to-cloud tool gives you the control and flexibility that native methods lack.
What tends to trip people up has nothing to do with the technical steps. It’s the assumptions: that sharing permissions carry over, that version history survives, that Google Docs arrive in OneDrive looking exactly as they did. They don’t, and knowing that before you start means you won’t be scrambling to fix things after.
Check your storage, run the post-migration verification checklist, and keep your Google Drive intact for at least 30 days. These aren’t optional steps; they’re the difference between a clean migration and a frustrating one.
If your transition spans a few weeks or you need both platforms accessible while your team makes the switch, managing two cloud storage accounts simultaneously is the part most guides don’t address. A tool like All Cloud Hub lets you view, organize, and move files across Google Drive and OneDrive from a single interface, without toggling between browser tabs or losing track of which version lives where. It’s worth considering if your workflow doesn’t fit neatly into a one-day cutover.
Once you’ve verified everything transferred correctly and you’re confident OneDrive reflects what your Google Drive had, the migration is done. Keep the checklist, communicate resharing needs to your team early, and the rest takes care of itself.
Frequently Asked Questions
- How do I transfer all my Google Drive files to OneDrive at once?
The fastest way to transfer all Google Drive files to OneDrive at once without downloading is Microsoft’s built-in OneDrive import feature. Sign into OneDrive on the web, open Settings, select “Import Cloud Photos and Files,” connect your Google account, and choose to import all files. The transfer runs entirely in the cloud. Alternatively, Google Takeout lets you export your entire Drive and deliver it directly to OneDrive by choosing “Add to OneDrive” as the export destination. Neither method transfers files in “Shared with me” automatically.
2. Can I transfer Google Drive to OneDrive without downloading?
Yes. Two native methods require no local downloads. Microsoft’s OneDrive import tool (available via OneDrive web or mobile app) copies files directly from Google Drive to OneDrive in the cloud. Google Takeout can also deliver your Drive export directly to your OneDrive account without touching your hard drive. Third-party cloud-to-cloud tools like All Cloud Hub also perform no-download transfers by connecting to both services via API. None of these methods require you to store files locally at any point.
3. What happens to Google Docs when transferred to OneDrive?
Google Docs are automatically converted to Microsoft Word (.docx) format when transferred to OneDrive. Google Sheets become Excel (.xlsx) files and Google Slides become PowerPoint (.pptx) files. Google Drawings, Forms, Sites, and Maps are not imported by Microsoft’s native tool and must be handled manually or with a third-party migration service. After migration, open several converted documents to check that formatting transferred correctly, as complex layouts or formulas may render differently in Office formats.
4. Does Google Takeout transfer folder structure to OneDrive?
Yes, Google Takeout generally preserves your folder structure when delivering files to OneDrive. Your exported files arrive in the “Apps > Google Download Your Data” folder in OneDrive, maintaining the original folder hierarchy from Google Drive. However, Google Takeout does not include files in “Shared with me”, only files and folders you own are exported. For very large accounts, the export is split into multiple ZIP files, and some folder reorganization may be needed after delivery.
5. Can I move shared Google Drive files to OneDrive?
Files in “Shared with me” are not automatically included in any migration method including Microsoft’s native import, Google Takeout, or most third-party tools because you do not own those files. To migrate shared content, you have three options:
- Ask file owners to reshare directly in OneDrive after your migration,
- Manually download shared files from Google Drive’s “Shared with me” section and upload them to OneDrive separately, or
- Use a third-party tool that explicitly supports “Shared with me” migration.
Note that sharing permissions cannot be recreated automatically — they must be reconfigured in OneDrive regardless of method.
6. Is there a free way to migrate Google Drive to OneDrive?
Yes, there are three free methods that require no third-party tools. The first is Microsoft’s built-in OneDrive import feature, accessible via the OneDrive web app it copies files from Google Drive to OneDrive at no cost and requires no software installation. The second is Google Takeout with the “Add to OneDrive” delivery option, which exports your Drive and places files directly in your OneDrive account for free. The third is using a cloud-to-cloud transfer tool/cloud storage management like All Cloud Hub, which helps you manage all your cloud storage and easily migrate your files cloud-to-cloud. The first two methods have limitations: sharing settings are not transferred, Google-native file formats are converted to Office equivalents, and files shared with you are not included. But the third one is the best migration option, for both individuals and teams.

